


")
")


")


I have watched every episode of “Sweet Genius” hosted by acclaimed pastry chef, Ron Ben-Israel. I’ve been a fan from episode 1 of Season 1 as I find it so amazing that the participants can come up with sometimes incredible creations from the mandatory ingredients which can range from the common to the bizarre. They have to come up with something inspired by an object or theme which can be unexpected like air. In Season 1, the participants had to come up with frozen, baked and chocolate desserts while in Season 2, they had to come up with chocolate, candy and cake. At the end of each round, Chef Ron Ben-Israel would look at one of the contestants and declare “You were no sweet genius” and the ultimate winner would be declared “You are a sweet genius and you belong in my world of desserts”.
Although I am no huge fan of chocolates, I love watching how they are created from scratch. I’ve taken a weekend chocolate making class before at an institute in Melbourne years ago. It was fun and so enlightening and gave me an understanding and appreciation of why pralines are so expensive. There are some really fine chocolate shops in Melbourne and they really love their chocolates there.
So when Starhill Culinary Studio offered me a course of my choice (how to choose when they have so many classes every month), my choice was the decorating pralines class presented by their pastry chef from Bangkok, Chef Chalit.
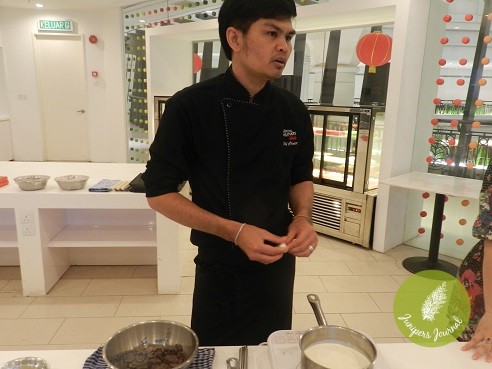
This was a 3 hour class and strictly on decorating pralines, we didn’t have to temper the chocolate like what I had to do at the class in Melbourne. Tempering chocolate takes a lot of time, skill and effort as one has to place the required chocolate pieces in a bowl over a double boiler and once the chocolate is melted, all of it is poured on to a marble surface and brought to the requisite temperature which is 30-31C for dark chocolate and 28-30C for white/milk chocolate.
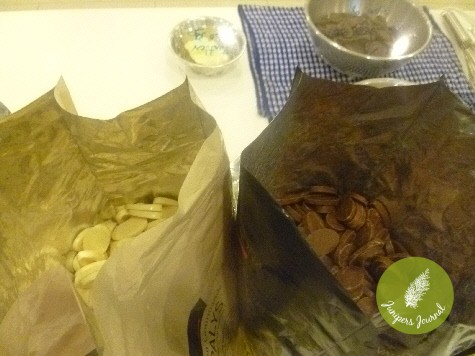
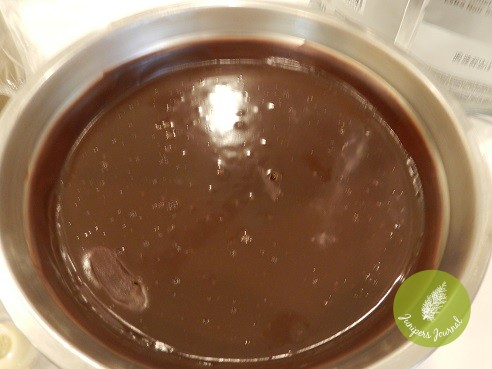
At this class, we were instructed on how to prepare the chocolate ganache required for the dark chocolate truffles and white chocolate strawberry truffles. We started with the ganache for the dark chocolate truffles and this involved heating cream in a saucepan until it is boiling, then pouring over the dark chocolate which had been melted. Butter is added until the chocolate is completely melted and the butter is well incorporated. It’s set aside until the ganache reaches room temperature. We used Valrhona chocolates which are the best, the dark chocolate has 55% cacao content. One look at the chocolate pieces in the bags reminded me that these are expensive and of superb quality.
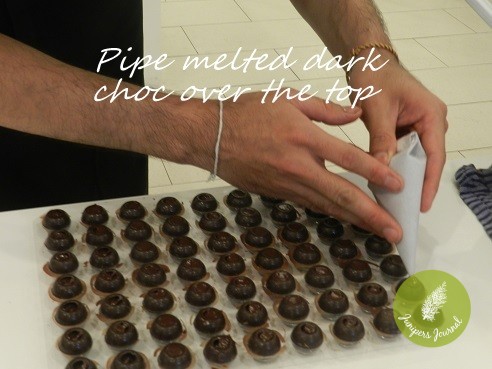
We had 2 sets of chocolate shells to fill with ganache, chocolate shells can be purchased from baking supplies shops. Chef Chalit demonstrated how to pipe in the ganache with a piping bag but believe me, it isn’t as easy as it looks as there cannot be any air in the shells, they have to be completely filled with ganache. There were many times when I thought the shells had been filled but when I swiped a finger over the top of the shells, it was evident that there was still space in there which needed to be filled with more ganache.
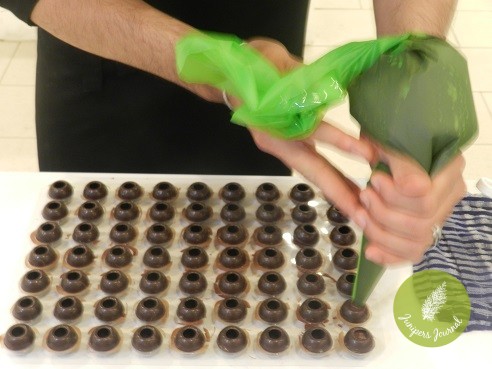
Once all the shells have been filled up, they are sealed by piping melted dark chocolate over the top and left to set.
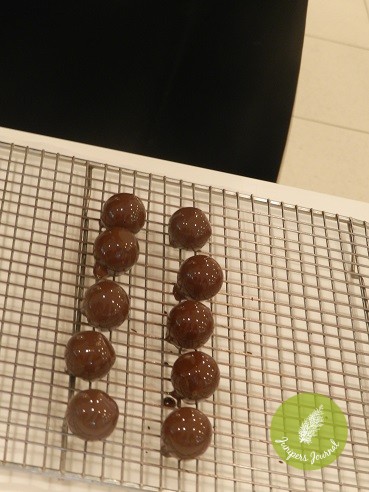
The fun part was dipping the shells into the bowl of ganache with a two-pronged fork if you wanted to make glossy pralines or a three-pronged fork if you wanted to make them spiky a la Ferrero Rocher type. I didn'[t master the glossy effect as there was too much excess ganache sticking to my pralines, it really takes practice! Rome wasn’t built in a day and I certainly don’t have what it takes to be a chocolatier in 3 hours! To create spiky looking pralines, we just rolled them along the wire tray.
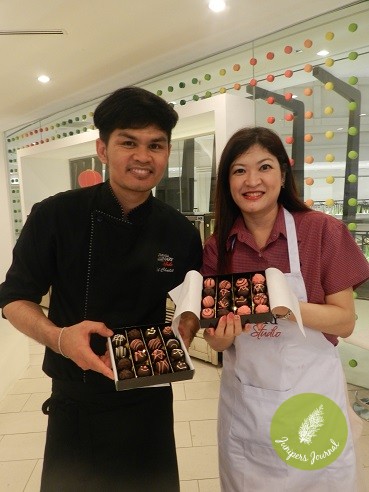
It was more or less the same procedure with the white chocolate strawberry truffles which looked quite beautiful even when created by this amateur! However, I prefer dark chocolate as I can’t take the sweetness level of milk chocolates. We filled up 2 boxes with our pralines to take home. My pralines may not be perfectly decorated but at least I have the satisfaction and pride that I made them.
Overall, it was a thoroughly enjoyable experience at Starhill Culinary Studio which is spacious with 12,000 sq. ft. It has a baking studio and pastry studio which is so ideal for events. They even offer one-to-one cooking lessons and if you aspire to be a domestic goddess, this is a great place to start your lessons as the instructors have years of experience.
As for me, I am already thinking of what my next class there should be as they even offer a meal to share with other students after the class and after my class, there was dim sum to be had. It’s really worth the price, classes range from RM138 to RM188 so whether you want to learn more about wines or make a bento meal, this is THE culinary studio to head to.

Starhill Culinary Studio
Starhill Gallery, Muse Floor
181 Bukit Bintang
55100 Kuala Lumpur
T: +603.2782.3810 E: info@starhillculinarystudio.com
W: www.starhillculinarystudio.com FB: www.facebook.com/starhillculinarystudio


Well done! Your chocolates really look so beautiful and professional! It is so tempting to look at the chocolates that you made. > <
Thank you for your comment, they do taste a lot better than they look! With more practice, anyone can make beautiful chocs.
Interesting. I didn’t know there is even a praline decorating class. I’ve only heard of cooking class … So outdated! Hahaha. I can see you really enjoyed the experience. Rm138~Rm188 is not super expensive, I’m tempted for the sake of the experience. ^_^
Let me know if you are interested in any class. I happen to have vouchers where you can bring someone else for the price of one.
Thanks ever so much for joining us for the class and we’re glad to hear that you enjoyed the experience – it was indeed a pleasure having you with us! Thanks too for the wonderully-written article on you blog – your support is much appreciated. Keep in touch! SCS
These looks good!